Tuesday, 10 November 2015

Cute Christmas Card

I have a cute little Christmas card to share with you today - this stamp is one of the new Marianne Design Cats and Dogs designs called Candlelight.  I received it as a gift from Marianne Design (thank you so much!) for my part in promoting the MD products.  I must say it is a pleasure to work with good quality and design craft goodies.

To the card!  I've stamped the image and coloured with my Copics then added Stickles to the snow.  I also used my new Viva Decor Ice White pearl pen as my old Wacco white one is almost out .. .. mmmm - I'm getting used to it and the pearls, although pretty and definitely more pearly, took longer to dry then I thought and I accidentally smudged a couple when moving things about on my desk.  Thankfully mini snowflakes came to the rescue!

Here's the card:


I got a pack of 5" grey cards with envelopes in the Buddly Crafts 50% off sale - could do with more but the grey's all gone. And I am determined to make a dent in my MD paper stash before I dare order any new .. .. so the papers on this card are all from the 6"x6" Wintertime pack. I've added the embossed faux stitching around the edge and inked it with Versamagic Aspen Mist chalk ink.  I cut a mat for the image with MD die CR1201 and a text banner from COL1325, then finished off with mini snowflakes CR1335 and the snowflake from set LR0327 cut from sparkle card.

That's it! a fairly flat card for posting or the doggy charity.  The challenge at Papertake Weekly is for Christmas Critters so perfect to enter! And at the Christmas Card Challenge blog it's anything goes so I can join in with them too.

Thanks for stopping by to take a peek, and I hope to see you again soon.

Sunday, 8 November 2015

Merry and Bright!

It is far from being Merry and Bright today here in North Cornwall, it's blowing a gale and poor Izzy is looking at me in disgust because I wont take him for a walk!  Instead I've been finishing off a few more of my UFO projects.  I have so many Marianne Design paper packs and I must use them .. .. with some of the papers I have no idea what I'll do as they are bright and busy and not to my taste - this one though is pretty!  It's from the Christmas Time pack and has the split design printed on the sheet. Here you can see the top half with a subtle snowflake design.

I decided to use my Snoesjes Freezing Cold stamp for the image, but after colouring with my Copics I fussy cut her out and added glitter for snow then gently moulded the image to fix down the middle with 3d foam tape.

Here is the card:


Now you can see the stripes on the bottom half of the paper, and I had picked out the green to mat with a green card from my stash.  I've gone around the edge of the paper with the faux stitching I create with die LR0161 , it's easier to see on the top half I think. Along the design join I added a pretty ivory die cut border layer LR0385 and a sliver of border left from another MD project.  To finish I've cut the mini snowflakes from the ivory card, mini leaves from the green, and mini flowers from red Mulberry paper.

The text is stamped from the new Merry and Bright MD stamp set, I just cut out the bit I wanted and layered up with a green mat.

I've added white translucent Viva Decor dots here and there across the bottom and on the border, and to the centres of the snowflakes and flowers, and I found a couple of odd red gems to finish things off.  Mum has a friend who is registered blind so I thought the bright colours, the cut out image and the dots I've added might help her 'see' the card.

The theme on Crafty Hazelnut's Christmas challenge is bright or sparkly colours - I've got the bright red and green on my card and added sparkly snow.

Well it's time for lunch and I do believe the sun is trying to shine so Izzy might just get that walk after all .. .. thanks for stopping by and hope to see you again soon!

Saturday, 7 November 2015

A Winter Card

This card is another of my UFOs - unfinished objects.  I had the base design covered in paper from this time last year .. .. but then didn't know what to do with it!

Finally, I've put a little something together with a pretty Marianne Design robin picture and some die cuts.

The Crafty Catz blog theme is for Winter so I can enter with them.

Here's the card:


It's a small square with a diagonal cut across the front and the cut piece glued inside to create a pocket.  I've decorated with die cut holly and ivy sprays along with Platinum Stickles around the image and for the berries.  The edges of the papers were already inked with Walnut DI so I used the same for the embossed areas and edges on the die cuts, and a little edging to the lace mat for my image.

The Marianne Design things I used are:
Paper from Eline's Winter House A4 pack (I don't think it's available this year)
Banner die COL1324 with text from COL1325

And this is what the inside looks like with the tag tucked into the pocket.  I've stamped a greeting near the bottom of the tag, hidden in the picture, and there is a stamped greeting on the paper too - both from Eline's Christmas stamp set from last year.

Unfortunately, although I have been able to use up some of my UFOs, I've also been creating a few more today!  Mr Mojo has gone AWOL so it's taking me ages faffing about and getting nowhere other than to make a mess on the table.  Ah well, tomorrow is another day.

Thank you for stopping by, and I hope to be back again soon with another UFO card to share with you!


Thursday, 5 November 2015

Food and Drink at CCT

This week our theme on the Cute Card Thursday blog is food and drink - both or just one or the other. Our sponsor for this challenge is Nikki at Bunny Zoe's crafts, please stop by the CCT blog to read all about it and see what the rest of the DT have created.

Well, I've gone for food, cake to be precise and made by the LOTV cute little mice.

I've coloured my stamped image with Copic pens and added touches of sparkle to the icing sugar with Stickles.  Here's the card:


The base was already in my started to make box .. .. .. a piece of pretty Nitwits paper I had inked the edges and stuck onto a plain white base, and that's as far as I'd got.  So that was the determining colour for my image and after rummaging in the bit box I found a couple other small pieces of Nitwits that matched so inked and layered them up too.  I also had an off cut of a pretty Marianne Design oval doily so popped that in behind the image that I cut out with the MD fancy square.  It was looking a bit plain, so I decided to add some faux stitching with a fine marker pen, then rummaged about and found ribbon to match so stuck that down, tied a bow and added the row of flat backed pearl string.

To get flowers to match I simply die cut them from white card then coloured with the darkest pink Copic marker I'd used in the image, and added the stitching.  To finish off I die cut and inked leaves and a swirl from the beige paper design and dusted areas with more Stickles - not showing up in the picture but quite sparkly in real life and the ribbon has a soft sparkle too.

Marianne Dies I used:
little bit of oval doily CR1204
square to cut image from LR0310
flowers in set LR0112
leaves in set LR0117
swirl in set LR0116

The challenge on the Sweet Stampin' blog is to use dies and/or punches along with some stamping, so I can enter my card with them.  On the Alphabet Challenge blog the theme is 'S' for sweet treats, oh yeh, cake! And at Incy Wincy blog it's anything goes so I'll enter with them too.

Thank you for stopping by and I hope you will come back again soon.

Wednesday, 4 November 2015

Too Much Snow!

I have just finished making four Christmas cards with my festive Don and Daisy stamps and papers from the Scandinavian Winter pack.  Three of the cards I'm holding back for my CCT DT makes, but this little Don shoveling snow didn't fit any of the upcoming themes so he's here today!

As the papers are shades of red and blue, that determined the Copic colours I used to colour my stamped Don image, then I added some sparkle snow on the ground and trees, and pearl pen for the falling flakes.

Here's the card:


As I got the paper pack a year ago (or was it two), I'm using up bits and pieces.  The blue layer is actually from a different pack but the oddment matched so I tucked it in.  It's a simple card, and the papers are quite busy so no need for tons of embellishments.  I've matted the image with a couple of different die cut layers, the blue one from LR0141 and the red from CR1248 .  I added a text stamped cut up from the new Eline's handlettering Christmas set, then finished with die cut fronds and flowers.  The flowers I cut from red Marianne Design mulberry paper then spritzed lightly with water and scrunched them up.  When dry I gently teased them out a little and stuck them down.  The centres are made with a Viva Decor pen that is transparent white - a bit odd really but it kind of gives an opaque look rather than being completely clear.

I can enter the Fab 'n' Funky challenge as they want you to use dies and/or punches - you know how I love my MD dies!

Thanks for stopping by and hope you'll come back soon!

Tuesday, 3 November 2015

Little Mice BirthdayCard

I have a little mice birthday card to share with you, it's relatively CAS, at least for me, and one from my UFO box (Unfinished Objects).

The image is the cute flower shop mice stamp from LOTV, coloured with my Copics then soft chalk ink around the edges along with a direct to image stamped text.  Here's the card:


It's another one of those where I'd got a piece of pretty paper stuck down already then changed my mind about what I was going to do, plus the paper didn't reach the bottom of the card anyway!  I fixed that with a piece of MD lace and a die cut border along with a length of pearl trim, this time round peals where I dabbed each with tacky glue and had to press down for a while to get them to stick!  The border die is the one I use to create the faux stitching around the edge of my images and layers, so gets used a lot!

A simple little square birthday card for the charity box, and hopefully will fit through the narrow slot at the PO too.  I have more mice to share with you later in the week .. .. watch this space!

Over on the ABC Challenge blog it's the letter 'U' for unlimited - so anything goes! I'll enter my card with them.

Thank you for stopping by, and hope to see you again soon!

Saturday, 31 October 2015

Snowman Freinds

I have another snowman card to share with you.  This is the cute LOTV stamp and I've coloured with my Copics then added flaky glitter and pearl falling flakes.

Now, before I show you the card, I have to say that it's not one of my best and I actually thought about ditching it .. .. but, the paper is Marianne Design and has been stuck down on the card base for a year - waiting!  And I am determined to use up those started but not finished bits and pieces and the boxes of odds and ends.  So, here is the card:


I think it's the colour that puts me off - I don't associate brown with Christmas!  I tried lightening things up with extra bright white Marianne Design die cut snowflakes too.  And then there was that tree .. .. I recently got the two new MD tree dies and had this one cut out from a dark kraft card as an experiment - and I hate to throw anything away.  So I covered it with the flaky glitter too and popped it in behind my picture.  It's growing on me and I guess some folks like brown!

There's lots of challenges with Christmas themes so I'm going to enter my cute snowman into the Allsorts blog, Winter Wonderland, and the ABC Christmas blog who are up to the letter 'V' for very cute - he is a very cute snowman!

Thursday, 29 October 2015

CCT Sparkles!

This week at Cute Card Thursday our theme is Sparkles! so your chance to add glitter and sparkly stuff to your creations!  Our sponsor is All Dressed Up and the rest of the team have been able to use some very cute digi images from Wendy's store, unfortunately I still can't print out digi images .. .. .. Please stop by the CCT blog to see what the team have created and read all about the prize.

I've inked up my favourite snowman, again.  He is from Serendipity Stamps and I wish still available from stores here in the UK.  He gets inked up regularly every year.  This time he's had Viva Decor 3d snow and glitter added along with touches of glaze pen too.  Here's the card:


It's a 5"x7" and I've covered the background with a piece of pretty snowflake paper from the Marianne Design Eline's Beach House, the soft blues are so pretty and I didn't want to cover up the design with more layers.  Unfortunately the colour looks washed out in my picture and more grey than blue, the camera is on the blink again or more likely the operator doesn't know the settings to use .. .. maybe I should have switched to the seaside setting to pick up the blues a bit better - must remember to try that on my next blue creation.  My favourite snowman is coloured with the soft blue denim Copic shades and wood tones, you don't need to be too precise as the stamped image has a rough pencil drawn effect so is easy to colour.  To add more sparkle I've cut the Winter text die from sparkly card, and some of the snowflakes too, others have been inked and glittered. The pretty ribbon across the bottom of the card is a sparkly organza and I've added a row of flat backed pearls across the middle for a little extra shine.


And to finish things off I've added even more Stickles sparkle onto the paper design.

The Holly Jolly Christmas blog challenge is for Snowmen this week, and it's the same at Crafty Ribbons. While over on the Christmas Card challenge blog it's an anything goes theme - to I'll enter my card with all of them.

And I almost forgot it was Rudolph Days at Scrappy Mo's blog!  From the 25th to the end of each month you enter a Christmas creation with a chance to win a prize.

Thank you for stopping by, and hope to see you again soon!

Wednesday, 28 October 2015

my new chalk pot


After watching the Viva Decor clips on YouTube about using this chalky paint, I decided to get the starter pack from Buddly Crafts and give it a go.  I've used Rustoleum chalk paint and wax on furniture to give the shabby chic look, but found the paint quite thin and have needed to use at least 3 coats to get a good coverage.  So, I was interested to see what this one could do .. ..

First up - it goes on glass and other non-pourous surfaces, as well as wood, mdf etc.  It's a soft buttery consistency so does give a good coverage when sponged on and dries rock hard, and I think from translation it can be used out doors.  I did learn from re-watching that if you want to do the 2 colour shabby look, don't leave your top coat of colour for more than 10 mins before starting to rub back or you'll never get it rubbed off and show the first colour underneath!  It does give good coverage.  Here's my first finished project:

I've made myself a new shabby chic pot for storing my everyday craft items from a small coffee jar.

The design on the front is created with this stencil and the Crystal clear Glas Effekt Gel.  I put the gel on through the stencil direct from the bottle as it has quite a fine nozzle, but as this is my first attempt I can see I missed a bit here and there.  The idea from the YouTube clip is that you cover the whole jar with 2 coats of chalk paint then when it's dry you sand back to reveal the clear design underneath.  I can tell you, that sanding back is hard work!  Still, the shabby chic look is there.  As the design is not that proud of the glass it's difficult not to sand back some of the paint off the flat jar around the design .. .. thankfully a little touching up afterwards solved that problem.

Here's a close up of the design:
I die cut the Marianne Design mini poinsettia from vellum, 2 layers of each size, then added Stickles around the edge and a bling stone in the middle before hot gluing onto the jar.

I decorated around the neck with some white pom-pom trim and striped gross grain ribbon to match the blue paint.

That glass effect gel goes rock hard - you can't get that off!  I am thinking it would look pretty with just little dots above the frosting that I've done previously, so will give that a go.  Or, as it comes in different colours and is weatherproof, it might be an idea to create some interesting garden ornaments - I could even stain glass the shed window!

Thanks for stopping by to take a look - and perhaps I've inspired you to make something a bit different and expand your crafting mojo!

Sunday, 25 October 2015

Trick or Treat!

Another Halloween card creeping in today!   This is one of my old Elisabeth Bell stamps from years ago and I don't think it's available as a digi - at least I didn't see it in the collection.

I've stamped and coloured with my Copic pens then put the card together with odds and ends of Nitwits digi papers from my bit basket.  Here's the card:


I've added a Penny Black die cut sentiment, punched stars and the die cut mini leaves from the Marianne Design Autumn leaves strip die. I've also done my faux embossed stitching around the edges of each layer and inked with Niagara Mist chalk ink.

There are a couple of challenges I can enter: both The Craft Barn and Sweet Stampin' have Halloween themes going on, whilst Crafty Cardmakers are looking for Autumnal colours.

Have a lovely Sunday, whatever you are doing.  Here in North Cornwall it is a glorious Autumn day with blue skies and no wind!  Rare in these parts so I'm going to make the most of it with Izzy.  Thanks for stopping by and please, tick a box before you leave.


Friday, 23 October 2015

Frosted Spice Jar

I'm back working in miniature! This is just a little empty Tesco spice jar, so about 90cm or 3.5" tall.

I was chatting on the Buddly Crafts Facebook page recently and got sidetracked into ordering the Viva Decor Matt Glass Paint in Mother of Pearl.  After watching how easy it looked on YouTube, I was hooked!  And yes, it is easy!

I taped masking tape around the jar, about where the lace is, and then sponged on the paint, this is just one coat.  Once dry it is rock hard and the jar can be cleaned with a damp cloth, and it comes in different colours too, I might have to try another one!

I've stuck down the two rows of cotton lace with thin red line tape and then added the fancy white and purple ribbon between them.  A rummage in my neglected flower bag came up with this lilac bloom, and I die cut a couple of leaves from pearl card with Marianne Design Craftable die Autumn Leaves.  I found hot glue was the best for fixing the embellishments and added the snips of Aurora pearl string and a little bow.


Here's a view from the side so you can see the lace better.  And I've also fixed a Marianne Design swirl cut from the pearl card and glued down over the frosted finish.

Around the neck of the jar I simple wound some soft string and tied a knot leaving the ends so I could add a little tag and a beaded charm.


Here's a close up of the embellishment.

I hope you like my miniature project.  I have another bit bigger jar as work in progress so once I figure out how to decorate it, I'll be back to share it with you.  I'm thinking it will be a nice T-light holder with the light flickering through the Mother of Pearl frosting .. .. ..

Thank you for stopping by, please tick a box, or if you have time leave me a comment and I will pay you a visit too!

Thursday, 22 October 2015

Moonlit night

Time for another challenge at Cute Card Thursday, and this week it's anything goes!  Our sponsor for this challenge is Pinky Dolls and some of the DT have used digi images from their store, so stop by the blog to read all about the prize and see what they made.

I really couldn't get motivated this week, so have been gardening instead! That being so, I had to look at my un-blogged creations to find something to share with you .. .. this is a card made from the rest of the mixed media painted card I made a while back.  You can see the Halloween card I created with the other half here. This one is a winter card and will probably be used for a winter birthday or to send to one of my friends celebrating Yule.

I've used a stencil along the top and down the right sight with transparent paste then added fine black glitter while the paste was still wet.  For the moon I punched out a circle from card to create a mat and did the same, but with shimmery glitters from my stash.

To finish I die cut the Marianne Design fence and trees from black card, then added 3d snow to the fence and dusted it with glitter too.

Here's a close up of my painted background:

It's created with a selection of old pearl and translucent paints, then I went over with the Tim Holtz crackle glaze.  And you can see the different shades of glitter on the moon better now, it's a real shimmery sparkly number!

I hope you like it - no other challenges I can see to link it up to but please do let me know if you can think of any.

I am playing about with some new crafty goodies and altered things .. .. messy but fun and hopefully I'll have something to share with you soon.  Thanks for stopping by, and please tick a box if you can.


Saturday, 17 October 2015

Two little cards for Marianne Design

The latest challenge over on the Marianne Design blog is to make 2 little cards size 10cmx10cm - that's around 4" square in imperial measurements.  The cards don't have to be the same, but can be if you want.

Here are mine.  I've made a base from dark kraft card then used Carnation White card with a little texture and pretty paper from the Marianne Design Victorian Vintage paper pack, and I've distressed the edges to keep with the vintage theme.  I'll show them each to you individually, but first here's the insides:

More of the same papers with a bit of fussy cutting embellishment on one, and for the other I die cut the round doily die and inked with Wheat chalk ink.

The sentiment is an old magazine freebie and I've stamped that with Perfect Plumeria chalk ink, I think it's more burgundy than plum.

Onto the individual details then:


For the 'Mum' card I cut my patterned paper out with the Marianne Design Elegant square die, the plain outer edge one.  I've added a snippet of Vintage lace called stars, along with a tiny organza bow, and above that is a snippet of pearl trim.

Mum is stamped and die cut from Marianne Design Vintage Alphabet set, with a snippet of Marrakesh trellis underneath, and a little butterfly to finish off.  The body of the butterfly is one of the oval pearls from the trim so matches perfectly!

The next card:


On this card I've die cut the Marianne Design fancy square from the Carnation White, and there are some embossed areas but I didn't ink .. .. so hard to see.  In the centre of the square is a little piece of the paper with a snippet of Scallop Vintage Lace and pearl trim in white, I must order some in ivory as that might have looked better.

Under that is the stamped and die cut candy heart from Marianne Design finished off with a small satin bow and another little butterfly fluttering in at the bottom corner.

I hope you like my little creations, I was getting bored with Christmas already! And, I am still very drawn towards the Shabby Chic style but don't like things too frilly .. .. so this is my version of it.

Crafty Creations theme is 'don't be blue' i.e. no blue allowed, so I can enter my little cards with them, and at Crafty Catz it's anything goes, so I can join in with their challenge too.

Thank you for stopping by, perhaps you would please take time to tick one of the boxes if you don't have time to leave me a comment.

Friday, 16 October 2015

Krafty Snoesjes and Owl

Our new challenge at Marianne Design Divas is to incorporate some kraft card into your creation, and of course to use a minimum of 3 MD products.  Our sponsors for this challenge are Bunny Zoe's Crafts and Marianne Design - pop over to the blog to read all about it and see what the rest of the DT have made.

I went quite krafty for my creation and stamped Snoesjes and the Owl onto a die cut krafty piece Blankina had kindly sent me. The die cut is from set CR1254 and isn't one I have .. .. yet!  I've coloured with Polychromos pencils for a change, as they seem to work well on kraft card, and of course I've added lots of glitter for the snow sparkling in the moonlight.

Here is my card:


A dark kraft base then lighter kraft on top before adding a piece of patterned paper from the Christmas Time pack. I've distressed and inked the edges of the layers. I've also cut several of my embellishment pieces from kraft card but changed the colour slightly by using a chalk ink over the die cut before adding the glitter.  You can see on the big tree, and the tall pinecones and poinsettia leaves where I just inked the edges. I used Niagara Mist on the tree, and Oasis Green on the pinecones and poinsettia leaves.  I've used Sahara Sand to ink the edges of the die cut greeting banner.  The poinsettia flower is one I made earlier from scrunched and inked handmade papers, I just added the little gem to the centre and a touch of frosting.

Marianne Design goodies:
Snoesjes and Owl stamp HM9475
Christmas Time paper PK9111
red gem JU0954
Banner die COL1324
text from COL1325
label die CR1254
Fir tree LR0378
Pine cones and twigs LR0286
Poinsettia LR0122

The Fab 'n' Funky challenge is simply to make it square - so I can enter my card with them! And over at the Christmas Card challenge blog it's anything goes - so there too!

Thank you for stopping by to see my latest creation with my Marianne Design goodies and I hope you will come and join in with our challenge, and don't forget, please tick a box if you like my card.

Thursday, 15 October 2015

CCT Candy

This week at Cute Card Thursday our theme is Candy .. .. so interpret any way you like!  Our sponsor for this challenge is Whimsy Stamps, please stop by the CCT blog to read all about it and see what the rest of the team have created.

With Halloween creeping up behind us, I've put together a little candy box for the kiddies that come around - last year just 6 little ones all together with a couple grown ups, so hopefully the same this year.  Most of my neighbours are more elderly or don't have young children so I'm keeping my fingers crossed.

I saw something similar on Pinterest so started out with an empty egg box.  The inspiration picture had it painted black, but I didn't have any black paint so instead went with blood red and used Alizarin Crimson Americana acrylic instead - one coat more than covered the green box but it was easier to spread the paint with a damp brush just to thin it a little.  The pumpkins on the side are a Penny Black stamp I've coloured and fussy cut out then fixed with a double thick 3d pad on the end pumpkins so they sit over the 'hole' but it still shuts - get that?


On top is an easel card with 'Little Witch' by Elisabeth Bell, coloured with my Copics.  I've stamped little bats and spider webs from another PB set and gone over areas with a sparkle pen, but unfortunately it doesn't show up.

The black mat is cut with Marianne Design die LR0310 and I've gone around the edge with black Stickles - you can just about make it out I think.

The stopper is an old brad from my stash, and the spotty paper is from my digi bit box. The 'Trick or Treat' die cut is from a Penny Black set.

Here's the inside of the lid:


I've die cut the 'BOO' from the same set and added black Stickles on top, then fixed onto a strip of bendy plastic so it bobs when the box is opened.

The stamped image is LOTV's little wizard, coloured with my Copics and silver pen for the stars.

And finally, the candy .. ..


The Halloween version of the Creme Egg (disgusting things).  I coloured tissue paper with Copics then used my fancy edge scissors to cut strips to use as padding in the box for the eggs.

Well, I hope my little Halloween monsters will like the gift.  I might have to make a few more little things just in case more of them turn up .. .. watch this space!

Moving Along With The Times blog challenge theme is for Halloween this week, so I can enter with them.

Thanks for stopping by, and hope to see you again soon.  If you've stayed with me this far, you might notice I have added a couple of tick boxes under the comment box, so if you don't want to leave a comment perhaps you would tick one of the boxes instead - thanks!

Tuesday, 13 October 2015

Mum's 90th Birthday Card


I am finally getting my breath back! It was Mum's 90th birthday on Saturday and I think all went well.  The cake wasn't too bad and the sparklers on top made it special.  It's hard to think of pressies for a lady that doesn't want to go out anywhere and doesn't lack for anything .. .. but we managed with chocolates, biscuits, flowers and a new Sudoko book to keep her mind active (but she does cheat and look at the back for the answers if she gets stuck!).

This is the card I made for her - something a little bit different from my usual style and although it looks easy, you wouldn't believe how much scratching of my head was involved!  I've fallen in love with the Studio Light products at Buddly Crafts and this card is made from the Janneke Brinkman-Salentijn designs.  I've used her pretty paper pack and cut out elements and picture to create the card.

I wanted to create a shabby chic style but not too fussy and rather than distress the edges of my layers, I found my old fancy edge scissors!  After cutting I've inked with Dusty Concord DI and layered up with plain paper for some strength so I could add dimension with 1mm foam tape.  To decorate I've added the strands of pearls, lace and ribbon, cut out the butterflies, covered a little cardboard heart with paper and ink, and die cut the flourishes LR0271, and leaves CR1336.  And I got some sparkly card to die cut the greeting using Marianne Design die LR0223 - cutting an extra th from the birthday to add after the numbers cut with die CR1282. The card is really thick and the glitter is encapsulated so it doesn't shed - and it cut perfectly with the dies.

Here are a couple of close ups of the corners:


This is the bottom corner with the pansy flowers I've fussy cut out and showing the little heart I covered with paper and a fussy cut butterfly.  I found the easiest way was to paint the edges of the heart first with my white dabber, glue on the paper and let it dry then use an emery nail file around the edge to sand off the excess paper, ink the edges then, if you think it needs it carefully add a touch more white dabber to the edge.

I think this is the lace I used.

And the pearl string I used is the 4mm size white one. It also comes in ivory too, as well as a pretty aurora I'm going to order, along with gold and silver - on this page.


And here is close up of the picture along with another fussy cut out butterfly.  I've inked the edges of the butterflies before fixing so they tie in with everything else.


Thank you for stopping by to take a peek at my card - I have a lot of catching up to do and to see if there are any challenges I can enter into .. .. had best put the kettle on first though!

Thursday, 8 October 2015

CCT and Just one layer!

EEk! I forgot it was Thursday!  So better late than never, here is my card for the Cute Card Thursday one layer challenge.  Our sponsor is All Dressed Up! please stop by the CCT blog to read all about it and see what the rest of the team have created.

One layer challenges scare me rigid!  I do like to embellish, a little bit any way, so how to incorporate a touch of embellishment onto just one layer?  Well, this is what I made:

I cut a piece of white card to C6 size but as a tent fold, then simple ran a score tool around the outside edge.  Then, having taken some inspiration from cards on Pinterest, I've die cut the snowflakes and text from sparkly silver card and stuck them down flat onto my base, so just one layer!

Embellishment wise, I've put a piece of lace across at a wonky angle (I'm good at those!) and tied a snowman charm onto silver cord and wrapped that around on top of the lace.

'Twas made just before I came down with the bugs a few weeks back - and I'm still suffering!  I am looking at it now and want to add a gem into the centre of those snowflakes .. .. ..

And, the snowflakes are cut with a die in the Marianne Design set LR0327 called Anjas' circle. It's my favourite snowflake so far this year.

No challenges that I can link up with, let me know if you can think of any.

Thanks for stopping by - I have to finish Mum's birthday card and get the house ready for the family invasion .. .. and the tumble dryer is making a terrible noise!

Monday, 5 October 2015

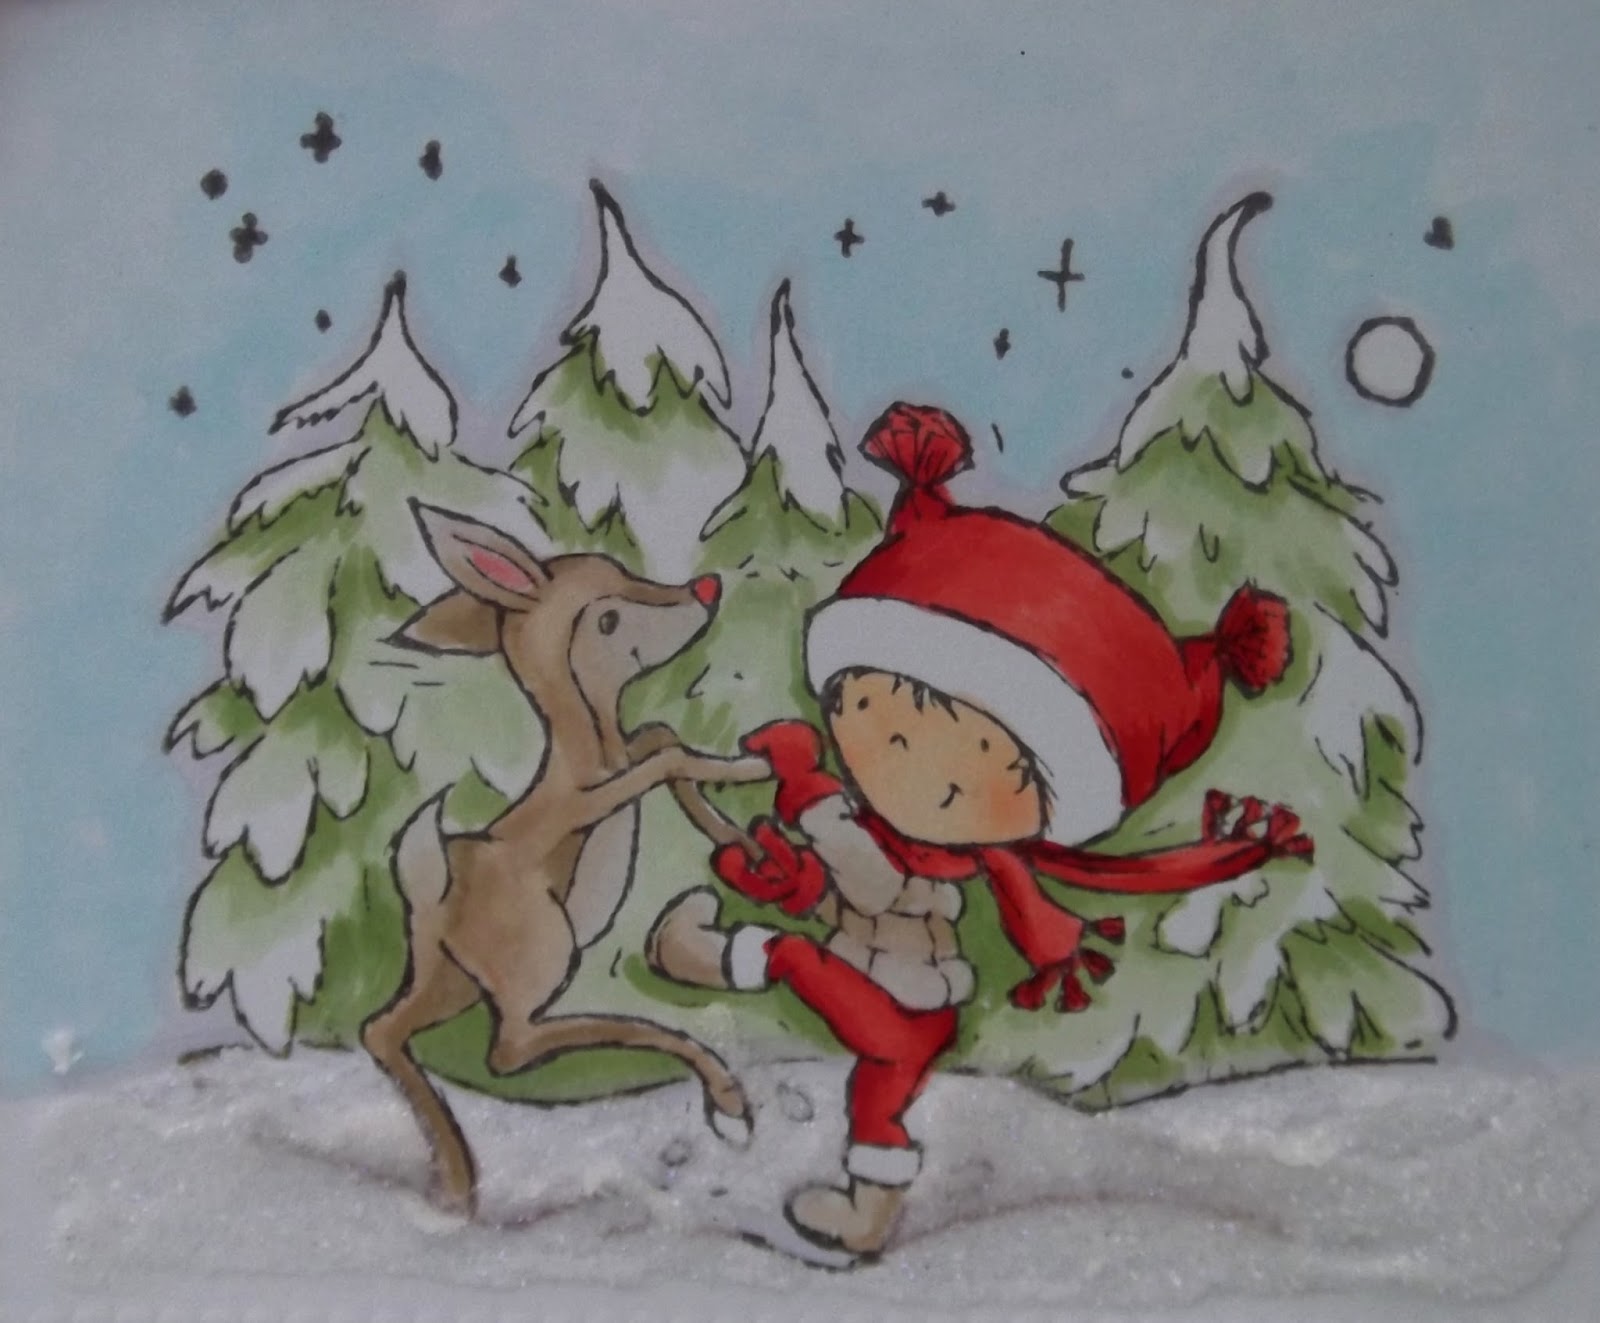
Daisy and Deer Dancing!

My order for the new Don and Daisy Christmas stamps came at the weekend and I got to play!

This stamp is Daisy and Deer Dancing - a little odd, but cute nonetheless. I've coloured with my Copics and added lots of glittery snow.  Here's the card:


It's relatively CAS, at least for me, with a base from my UFO box already made up with digi scraps from last year, or perhaps the year before .. .. I matched up the thin ribbon lines with bright red cardstock to mat my image, cutting with the Marianne Design large postage die to fit, then finishing off with another bright red bow.

I've found a new to me challenge blog called the Crafting Musketeers, and their current theme is Christmas with ribbon, so I can enter my card.

Thanks for stopping by, and hope to see you again soon.

Sunday, 4 October 2015

Butterfly Blue

Today I have another little project to share with you now I know it has arrived at it's destination.  It's made up of bits and pieces and odds and ends and isn't very big, but I am liking working in miniature!

I started out with a square cut from the cardboard at the back of a notebook that I painted with the Americana Light French Blue paint.  I cut a piece of paper from the Marianne Design Flower Garden pad to fit on top, and distressed the edges before sticking down, then it was a case of using up scraps from the pad and oddments from my stash for decoration.

Here in the close up you can see the twin hearts that I covered with paper then took an emery board to the edge before carefully adding white paint from a Dabber and glittering the butterfly in the design.  You can also see the pretty MD Marrakesh trellis die cut pieces too, the bits that fall out I stuck down towards the top.  Everything got touches of Distress Stickles in denim blue added with the crafters best tool, the finger, and Stickles in blue for the butterfly on the paper design.  I've also added Glossy Accents to the numerals dial on the clock print of the paper.  Here's the finished hanger:


I little bit of a scrap die cut trellis to poke out from behind a scrap of paper, and the layers of lace and ribbon.  The back is quite plain with just another piece of pretty paper and a plain layer to write on - I can't show you as I took the pics after writing .. .. I hope the recipient likes the little hanger.

I can enter into Pixie's Snippets # 197 as this decoration is all made of snippets!

Finally, I think I'm on the mend.  Still got the cough but not as much now or for as long in the mornings trying to clear the overnight accumulations, and breathing is much easier thankfully.  I spent yesterday making up Christmas cards from odds and ends of started but not finished designs, feels good to have less in the bit box!  I'll be sharing them with you over the next few days.  Thanks for stopping by, and enjoy the rest of your weekend.

Thursday, 1 October 2015

CCT Masculine

Time for our next challenge at Cute Card Thursday, and this week we would like to see something masculine - ummm, well, I kinda got carried away with the flowers on my card, but who's to say men cant do flowers, in pink and blue, with a bit of netting and fish?

Our sponsor for the challenge is Bunny Zoe's Crafts, please stop by the blog to read all about it and see what the rest of the DT have made for inspiration.

Thankfully I got my card made before the bugs struck me down.  The image is an old Papermania stamp set, coloured with my Copics - here's the card:


An artistically wonky shot! Well, I kept the card plainish, with a selection of papers from my bit box that I just distressed around the edges.  The piece behind the image I've embossed with the Marrakesh folder and inked to highlight, can't remember the colour I used but it is a Versamagic chalk ink .. .. ..

The little bit of mesh I thought looked like netting, and pulled out some strands to colour with an aqua ink and tie in a knot.  The fish I stamped up from the Marianne Design Eline's Beach House, coloured with chalk inks and fussy cut out.  I used the same inks to colour the mulberry paper flowers punched out with the CR1323 flower punch die then spritzed and shaped with a ball tool and when dried I've layered up some of the bigger flowers.

The Sweet Stampin' challenge blog theme is for a non white base, mine is aqua so I can enter!  The Creative Card Crew are also looking for masculine creations this week so I can enter with them too.

Thanks again for stopping by - I've still got a few cards I can share with you but I've not made anything this week, Mr Mojo is all coughed out.  I really do have to start working on Mum's birthday card though - she will be 90 years old this October so I had better make it special!